Keeping it Clean - Outdoor Shower - part 1
Back when we first decided to build on the property we knew that to do pretty much any construction we needed to be able to shower afterwards. It did not have to be fancy, but it needed to have warm water, be private and not cost much since it was to be temporary.
Hmmm
We managed to buy a propane powered camping water heater that could hook up to a hose. The end with the water pump went into the lake and we hooked the other up to a normal shower. OK, point one covered. The privacy and the cost thing worked out great. Our cottage was built from an old one that had been taken down and there were cedar boards that had been previously used as a subfloor. Not attractive, full of cut off old nails – but free tongue and groove cedar. A day of assembly produced a functional temporary unit that did us for years – far longer than we had intended. Over those years we did have to replace the water heater, and had to cage the new water heater after a mouse decided it would make a great abode. There is nothing quite like a mouse fleeing down the water hose right after one engages the water heater.
Ultimately we decided to build this on the side of the
building in a location (see above) that could not be seen into from any of the cottage
windows. This area had previously been a
bit of a path from one side of the cottage to the other (lakeside to
non-lakeside) and had been covered with medium sized pebbles. The plan was to make the base of concrete,
and the walls of cedar milled to mimic the existing cottage wall structure.
And the boards now sported an entirely new profile.
The whole thing had of course been designed in great detail and we knew exactly where the concrete base should go, where and how it should slope, and how to get the water out of there afterwards.
A deep-ish hole had to be dug for the outer posts (the inner wall was supported by the cottage wall itself)
The base area had been carefully edged with wood to hold the setting concrete in place to cure.
Much mixing, wheel barrowing, vibrating and smoothing followed
By the end of things there was a lovely (?) base to both the shower
and the water treatment shed.
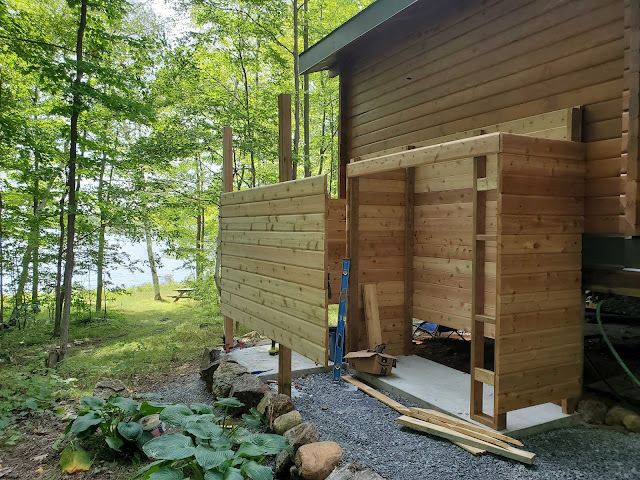
Next of course was the installation of the walls. Some were built in place while some of the
rest was pre-done using the limited flat surfaces at our disposal and installed
as one unit.
At this point it was still raw cedar. Advice from the woman whose company did the sanding and refinishing of our cottage a couple of years ago told us that we should wait to do the staining and finishing until the following year (I assume to allow complete drying), and also following washing the entire cottage to remove pollen etc.
So – we had to delay some work to 2021 – what a shame


Comments
Post a Comment